Homemade Rock Candy
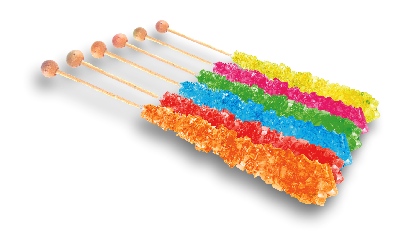
Discover the science of crystallization with this fun DIY rock candy experiment! Using simple household ingredients, you'll explore how supersaturated solutions form colorful sugar crystals while learning about chemistry, crystal growth, and molecular structure through a hands-on STEM activity that's perfect for home or the classroom.
Fun Facts/Information:
- Crystal Science in Action: Rock candy is made through a process called crystallization, where sugar molecules arrange themselves into a repeating pattern. It's a sweet way to teach about solids and molecular structure!
- Supersaturation Magic: The sugar solution used is supersaturated, meaning it holds more sugar than normally possible at room temperature-thanks to heating. This sets the stage for crystal growth!
- Slow and Steady Grows the Candy: Rock candy crystals grow slowly over several days. The longer they grow, the bigger and clearer the crystals become-great for teaching patience and observation.
- Color and Flavor Fun: You can add food coloring and flavor extracts (like cherry or mint) to make rock candy more exciting and personalized-perfect for a creative science+ art crossover.
- Ancient Origins: Rock candy has been around for centuries! It was used in ancient India and Persia for medicinal purposes and as a sweetener.
Learning Objectives:
- Understand that mixing sugar (solid) and water (liquid) creates a new solution.
- Observe how sugar crystals in the solution can solidify to create rock candy.
Materials:
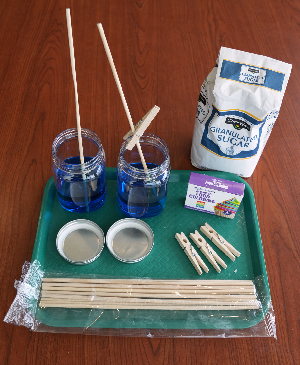
- Granulated sugar (4 cups)
- Warm water (2 cups)
- Skewers or string (Four 12 in. lengths)
- Mason jars
- Clothespins
- Food coloring or flavoring (optional)
Safety Considerations:
- Always use adult supervision with hot stoves, sharp tools, or boiling water.
- Practice proper hand hygiene when handling food.
Procedure:
- Heat the 2 cups of water in a saucepan until it's almost boiling.
- Gradually stir in the 4 cups of sugar, a little at a time, until it fully dissolves.
- Keep stirring until the solution is saturated (you may see a bit of sugar that won't dissolve this is okay).
- Remove from heat and let it cool for 10-15 minutes.
- Add food coloring and flavoring if desired.
- Pour the solution evenly into 4 jars.
- Suspend a stick or string in each jar using a clothespin to keep it centered.
- Let the jars sit undisturbed for 5-7 days. Crystals will begin to form and and your rock candy will begin to grow!
Discussion Questions
- What is a crystal, and how does rock candy show us what crystals look like?
- Why do we heat the water before adding sugar?
- What do you think would happen if we didn't let the solution cool before adding the stick?
- Why do the crystals grow on the stick and not just in the jar?
- How could we change the experiment to see different results?
Quick Links

Where are Activities Available?
We partner with over 600 educational organizations.
See our school locator